Vintage Kitchen Glow-Up
Sometimes you need to update a kitchen but your budget just doesn’t allow for a full renovation. In this vintage kitchen, we tried to modernize the space while keeping the costs as low as possible. OK, OK, full-disclosure—this is the kitchen in my own home. There are future goals for a complete renovation but, for now, I just wanted to modernize and upgrade where it made sense.
The Original Kitchen “Features”
The home was built in 1948 and, other than the first two years of it's life, it was owned by a single owner who did not make many updates along the way.
The original kitchen had the following features:
Large 1940s Occidental range. The range was in working order and was a cool vintage feature but it was incredibly grungy and had some wear and tear (broken parts, chipped enamel). After realizing (via research on Craigslist) that there were A LOT of similar stoves for sale and in better condition, I knew I wouldn’t likely be able to sell it. A neighbor offered to take it off my hands to use in their weekend cabin. So, with the agreement that they haul the heavy beast away, I was able to move it along to its next home. I am so happy it is now living its best life at a cabin in the woods somewhere!
Wall-to-wall and up-the-wall formica. The formica counter curved right up into the formica backsplash.
Enamel Double Sink. The sink was in great shape but the sides of each section tapered so much from the top edge to the bottom that it barely fit a single dinner plate at the bottom of the sink.
“New” faux wood floating flooring. Very utilitarian and fairly indestructible, I am guessing this flooring was added somewhat recently. It covered an original, vintage linoleum floor. After lifting a corner, I could see there was wood flooring underneath the linoleum.
Original cabinetry. The cabinets were all in working order. Of course they did not have nice modern features like self closing hinges and drawer slides. But, they were nicely built to the ceiling on the primary wall so that was a benefit.
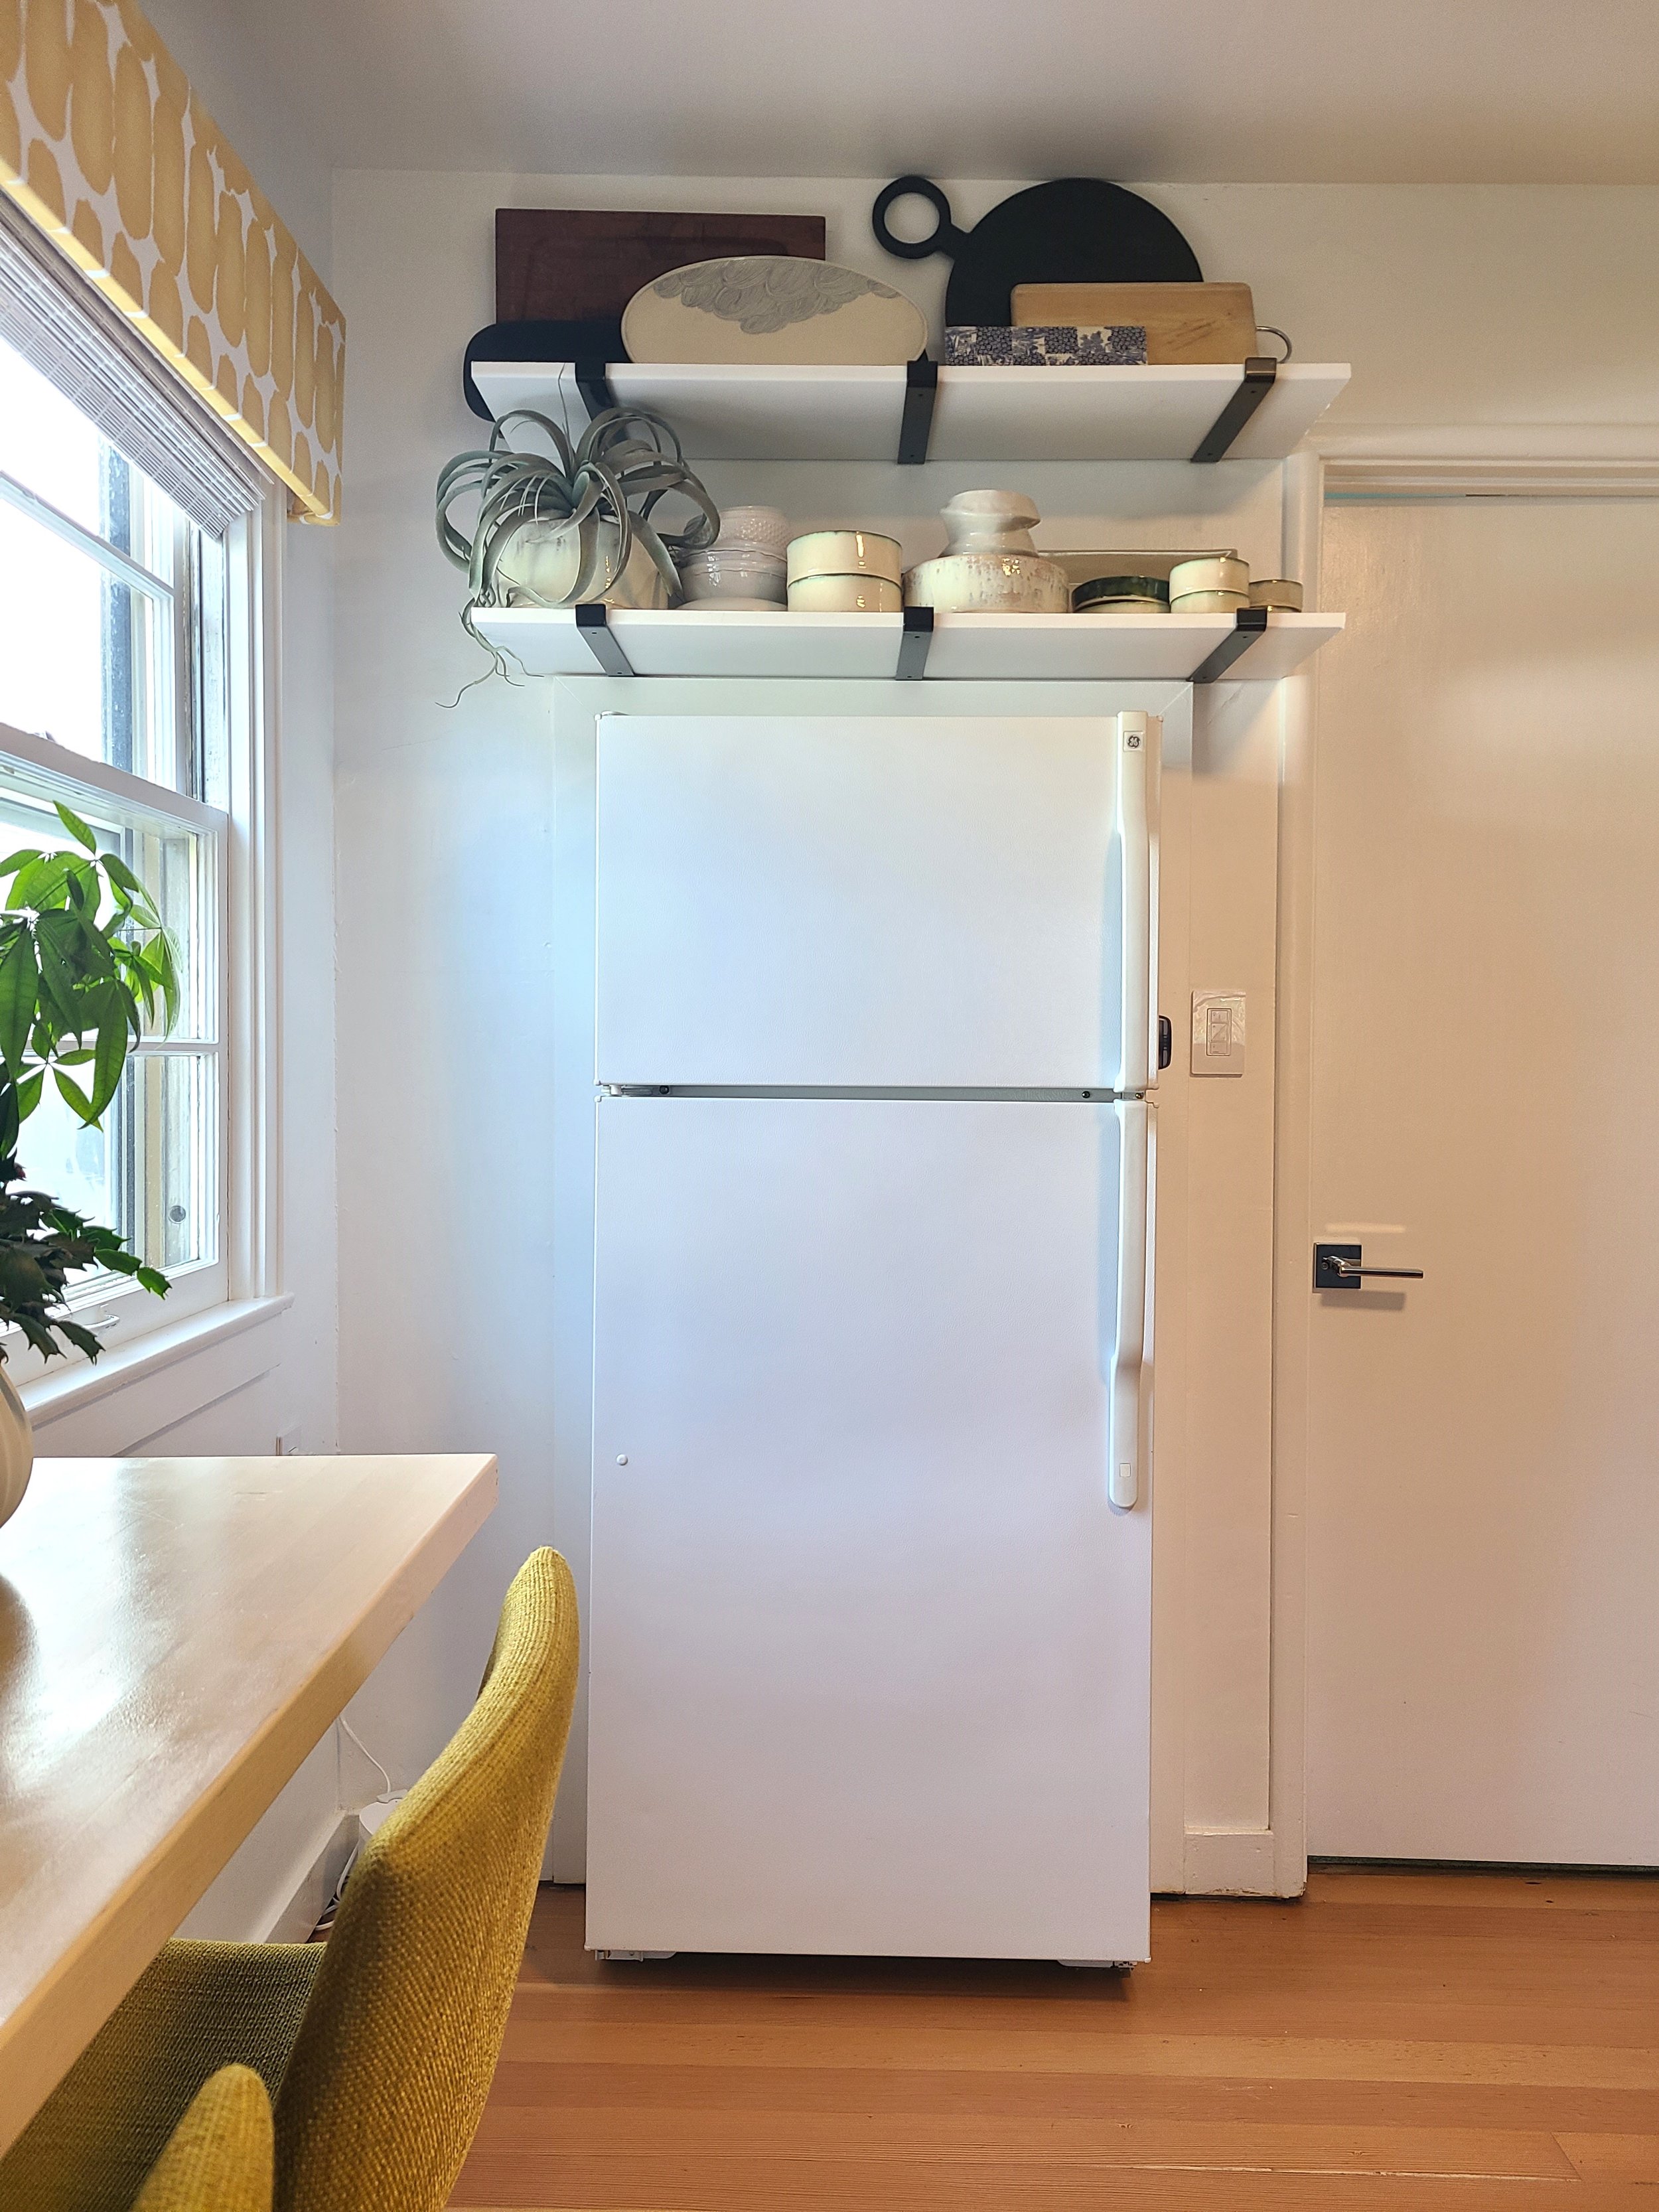
An oddly recessed, smaller-scale, low-end white fridge. Not modern but, it worked fine. And, in order to fit in its current space, it was partially recessed in the wall (which backs up onto a utility room).
Take a look at these before shots.
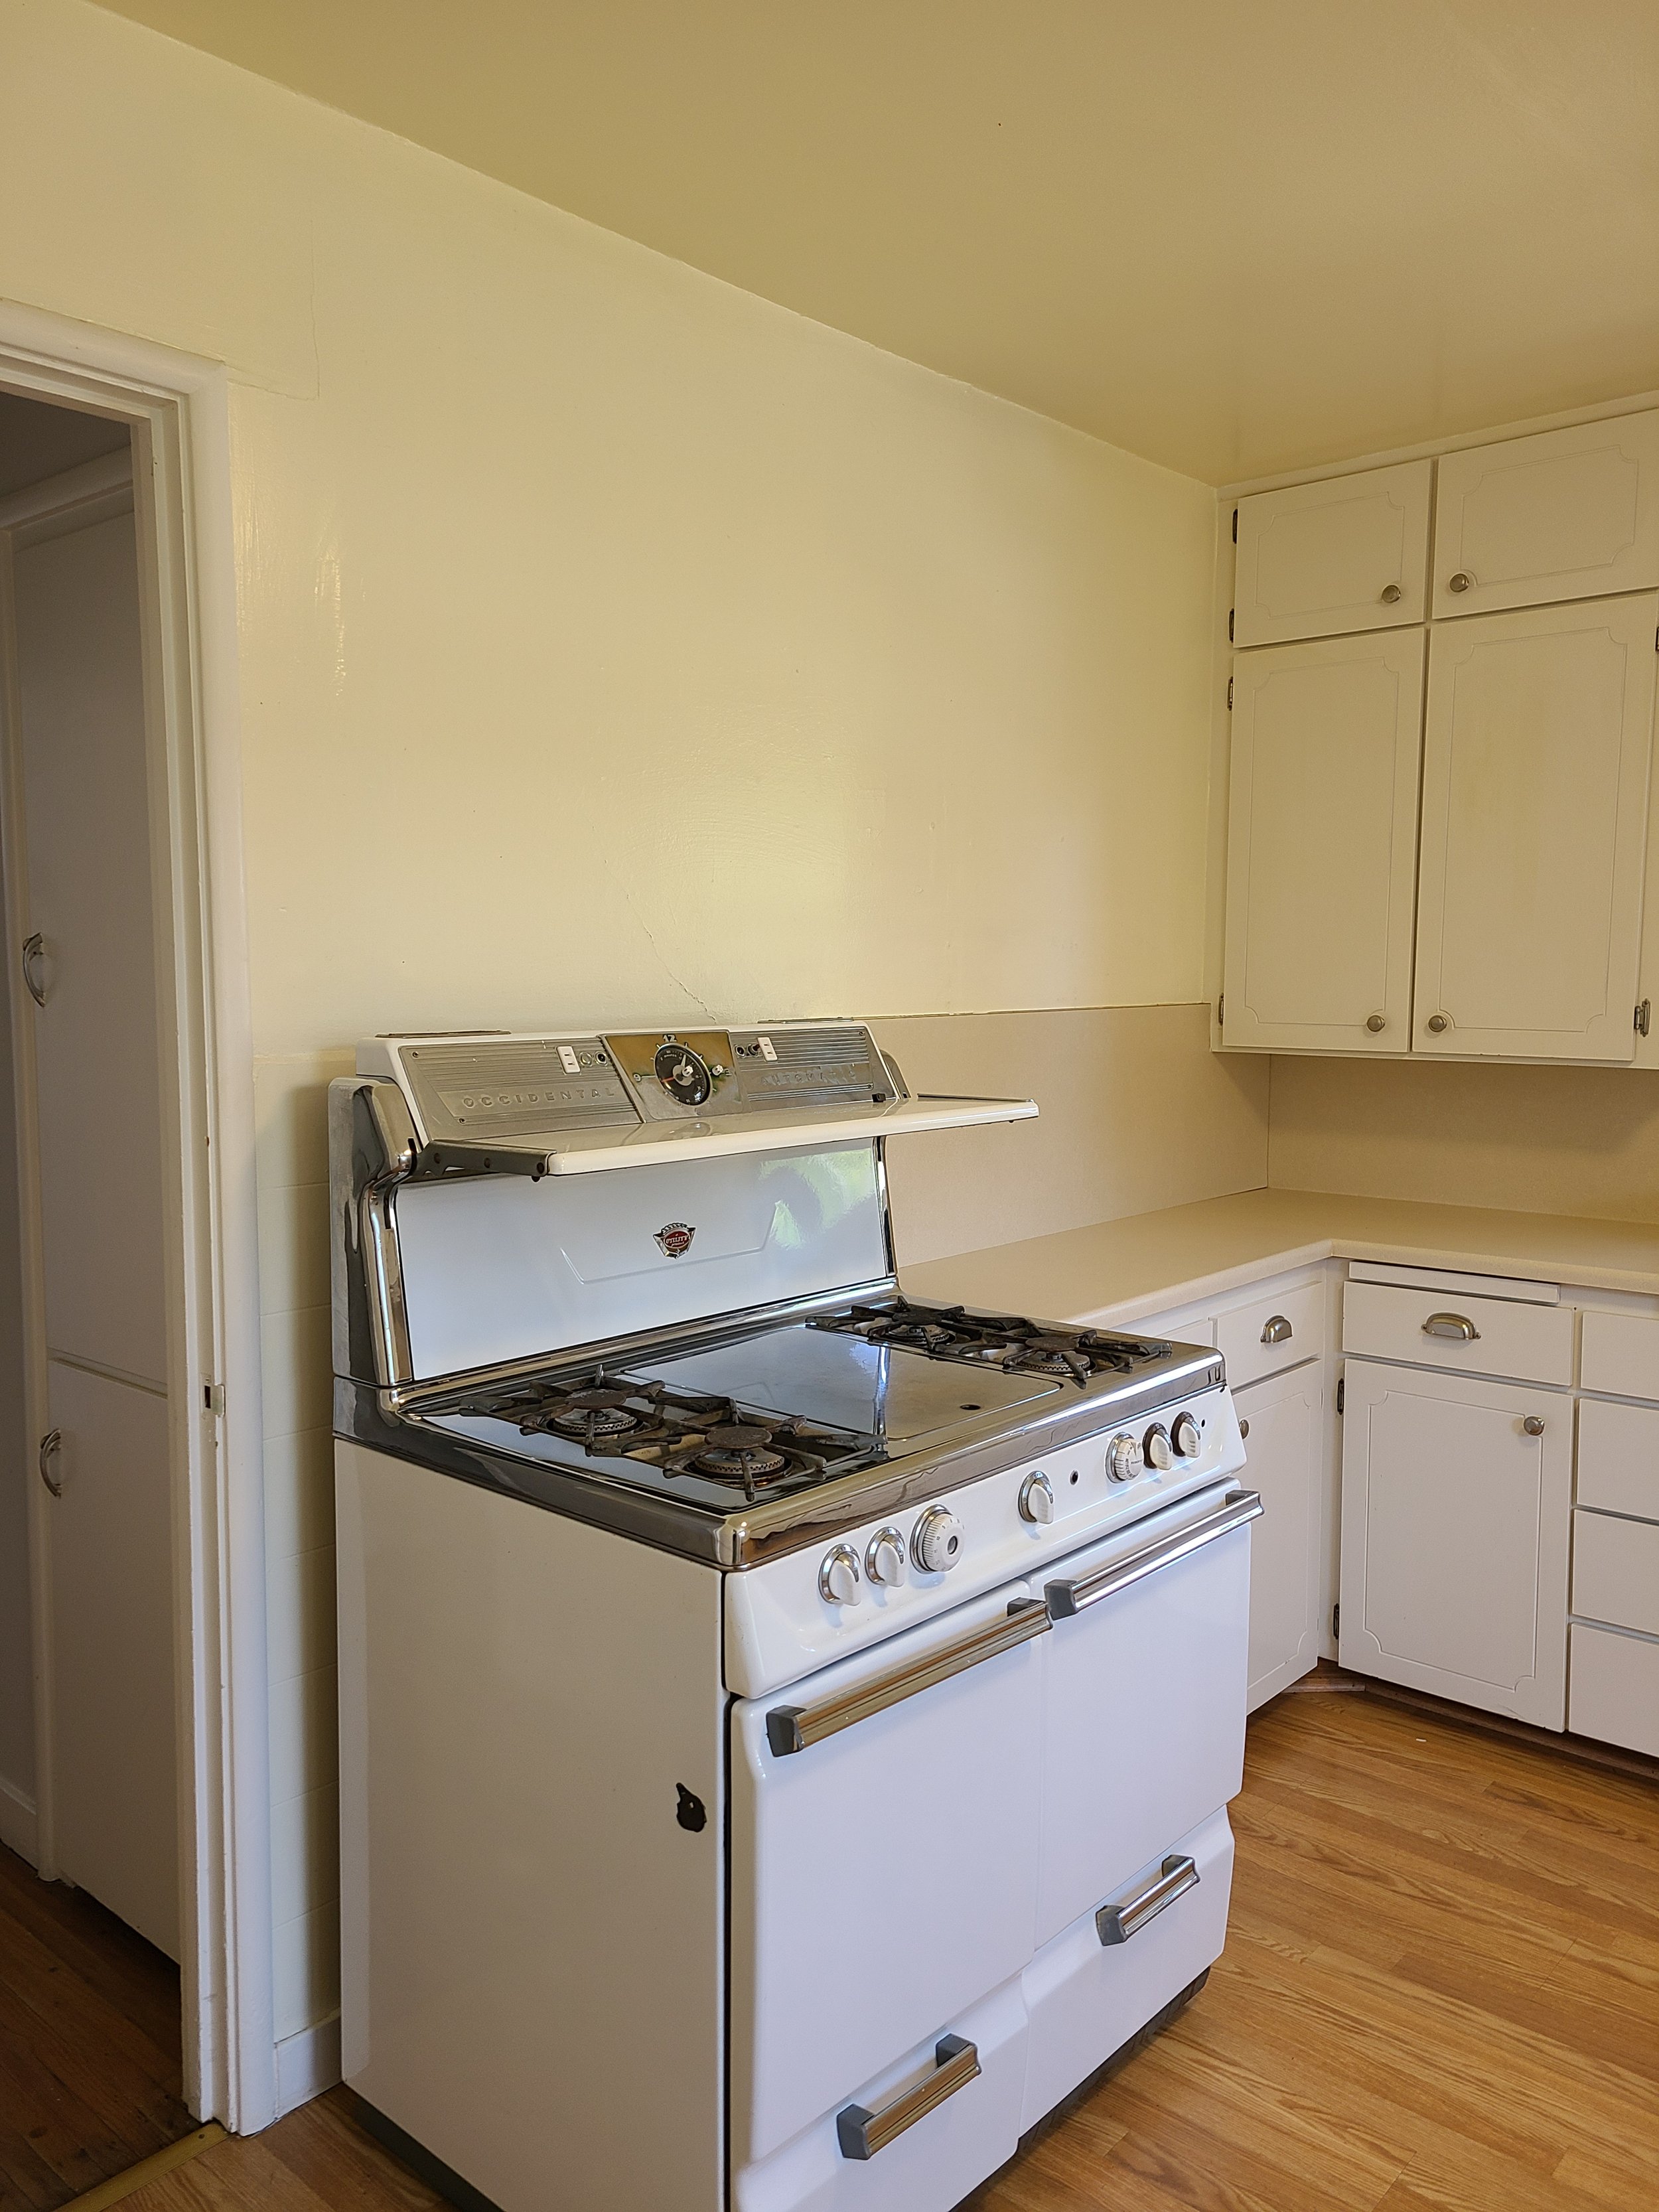
Before: Left side of kitchen with 1940s Occidental stove.

Before: Main wall of original cabinetry with enamel sink and wall-to-wall and up-the-wall formica.

Before: Right side of kitchen where you can see a bit of the fridge.

Before: You can see that in order to not block the window, the fridge has been recessed into the adjacent room which is a utility room.
The Kitchen Glow-Up
Given the entire house was a fixer-upper, I did not want to put a lot of expense into the kitchen as my budget was more critically needed elsewhere. Eventually, the entire kitchen will be redone but, until then, I just needed to modernize what was existing for limited expense.
Here is a list of how I put lipstick on a pig to present my Kitchen Glow-Up:
Removed Pergo flooring and linoleum underneath, sanded down old linoleum glue to expose the current wood floors. These floors do not match the floors throughout the house. It seems like, even though this is fairly nice wood flooring, it was just a sub-flooring for the linoleum. Regardless, it cleaned up beautifully leaving me with a nice wood floor in the kitchen.
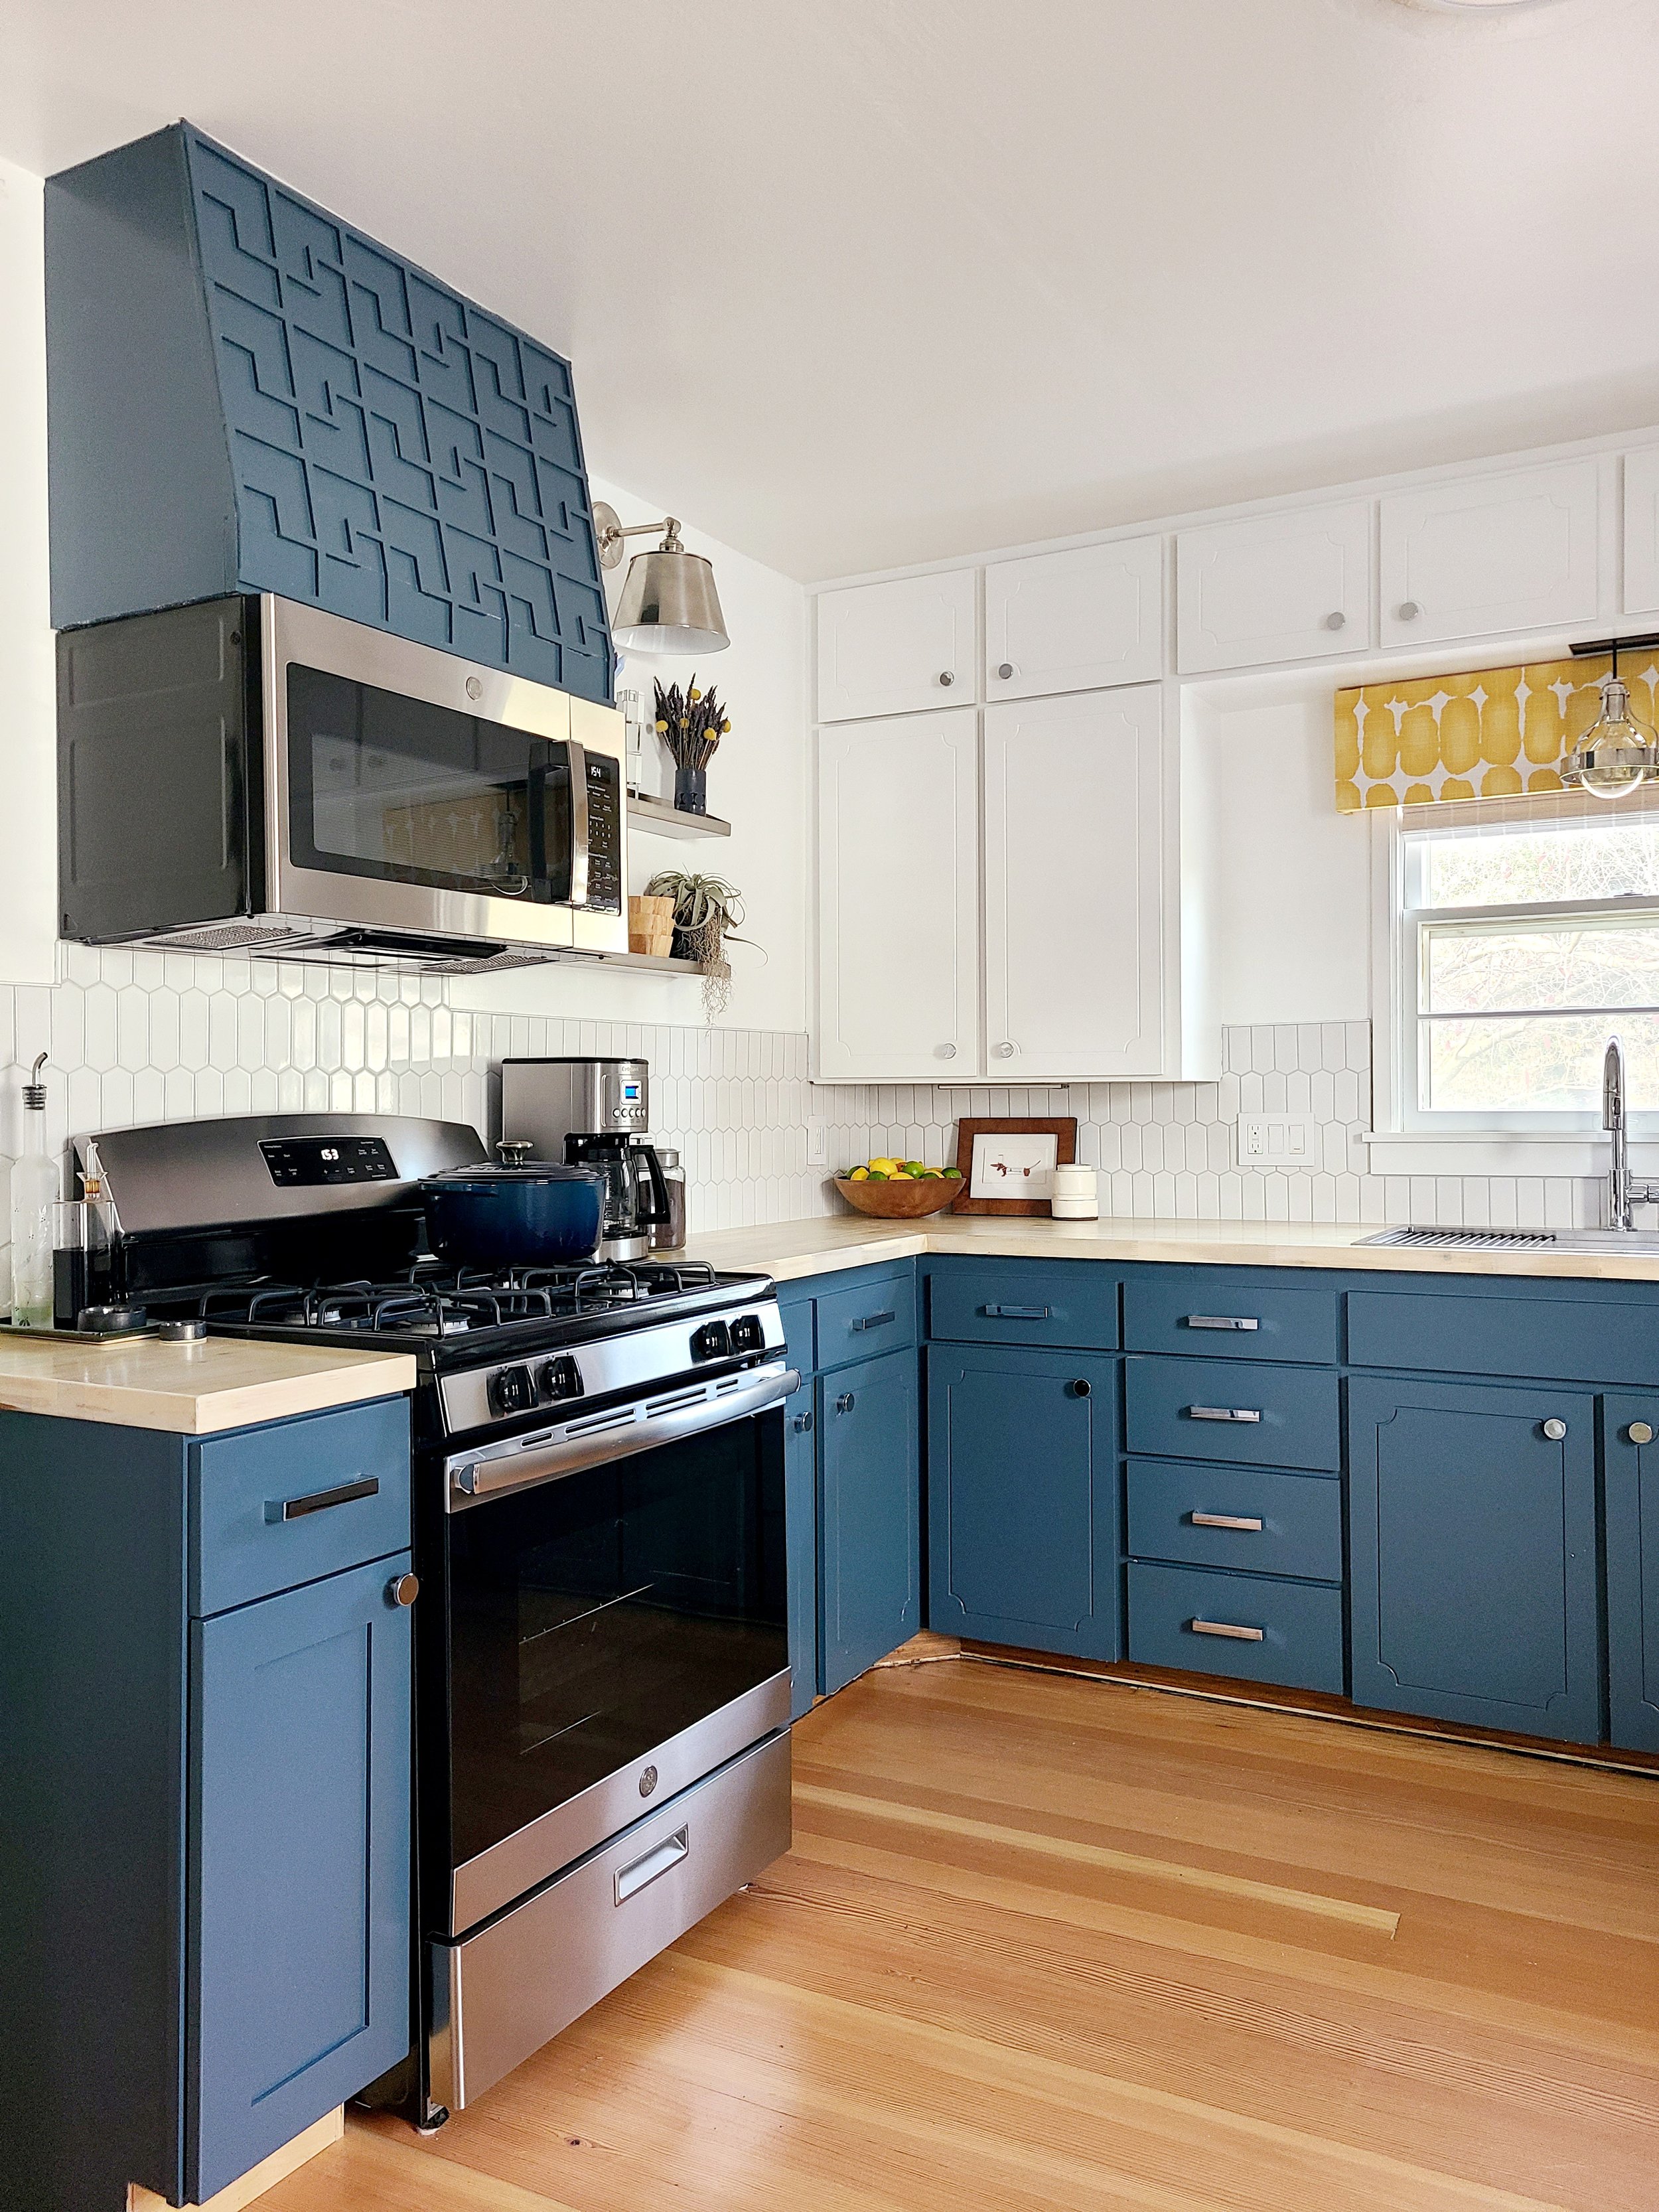
Added in an entry-level, big box store range.
Added a microwave with vent over range. Typically these kinds of microwaves are mounted to a cabinet above. But, I didn’t want to have to add a cabinet above just to be able to hang a microwave and vent. Especially because, once mounted, that cabinet would only be disguising the vent shaft and not provide any useful storage. So, instead, I built a wall-mounted hood and mounted the microwave to that. I add a decorative design to the front for some visual interest and texture. I still need to adda vanity panel on the ends of the hood and microwave so that you don’t see the ugly end of the microwave.
Added a small, cabinet to the left of the range to maximize the remaining empty space left from removing the original XL Occidental range. This was just a stock, one-foot wide cabinet from a big box store so the cabinet door does not match the other cabinets in the kitchen. For the most part, you don’t notice this when you are in the kitchen. Though it is not ideal, it is fine for this interim version of the kitchen.
Removed all formica and added a butcher block counter and tile backsplash. I put a white wash on the butcher block to lighten up the coloring before I polyurethaned it. The tile is just a readily available double picket white tile.
Replaced the enamel sink with a large, single bowl, drop-in stainless sink with a disposal and new faucet.
Removed the stack of drawers to the right of the sink and replaced them with a dishwasher. This required a slight rebuild of the farthest right cabinet and drawer/door to accommodate the remaining space to the right of the new dishwasher. Since this was handmade (as opposed to being a stock cabinet), we made sure to duplicate the design on the front of the original cabinets.
Replaced all of the external cabinet hinges with interior, self-closing style hinges.
Replaced all of the cabinet hardware.
Added a wall mount counter in the same butcher block as the counters. Added bar stools to act as a breakfast bar. It also provides a spot for guests to hang out in the kitchen and a drop zone for unloading groceries.
Quite a few cosmetic updates were also added including:
Painting the lower cabinets dark blue
Changed the odd little ambient light over the sink into a pendant light (even though it oddly hangs through the cabinet).
Added shelving above the fridge for extra storage as well as helping to make the recessed fridge seem more inclusive into the space.
Added decorative shelving and lighting to the right of the range hood. The light is a proper light fixture but there was no electrical in this location. So, this fixture was just screwed to the wall and a battery operated bulb was added.
Added matchstick blinds to the windows as well as upholstered box valences.
OK! I think that covers it all! What do you think about where we ended up?
After: Still need to add a vanity panel to end of hood and microwave so you don’t se the ugly side of the microwave.

After

After: Still awaiting a new ceiling light fixture that will cover up the mess around the existing ceiling light.

After

After: No, that upper shelf isn’t sagging. It is just an illusion from the angle of the shot.
After
Look at the two images below to see the difference that was made just by remounting the cabinet doors using internal hinges!
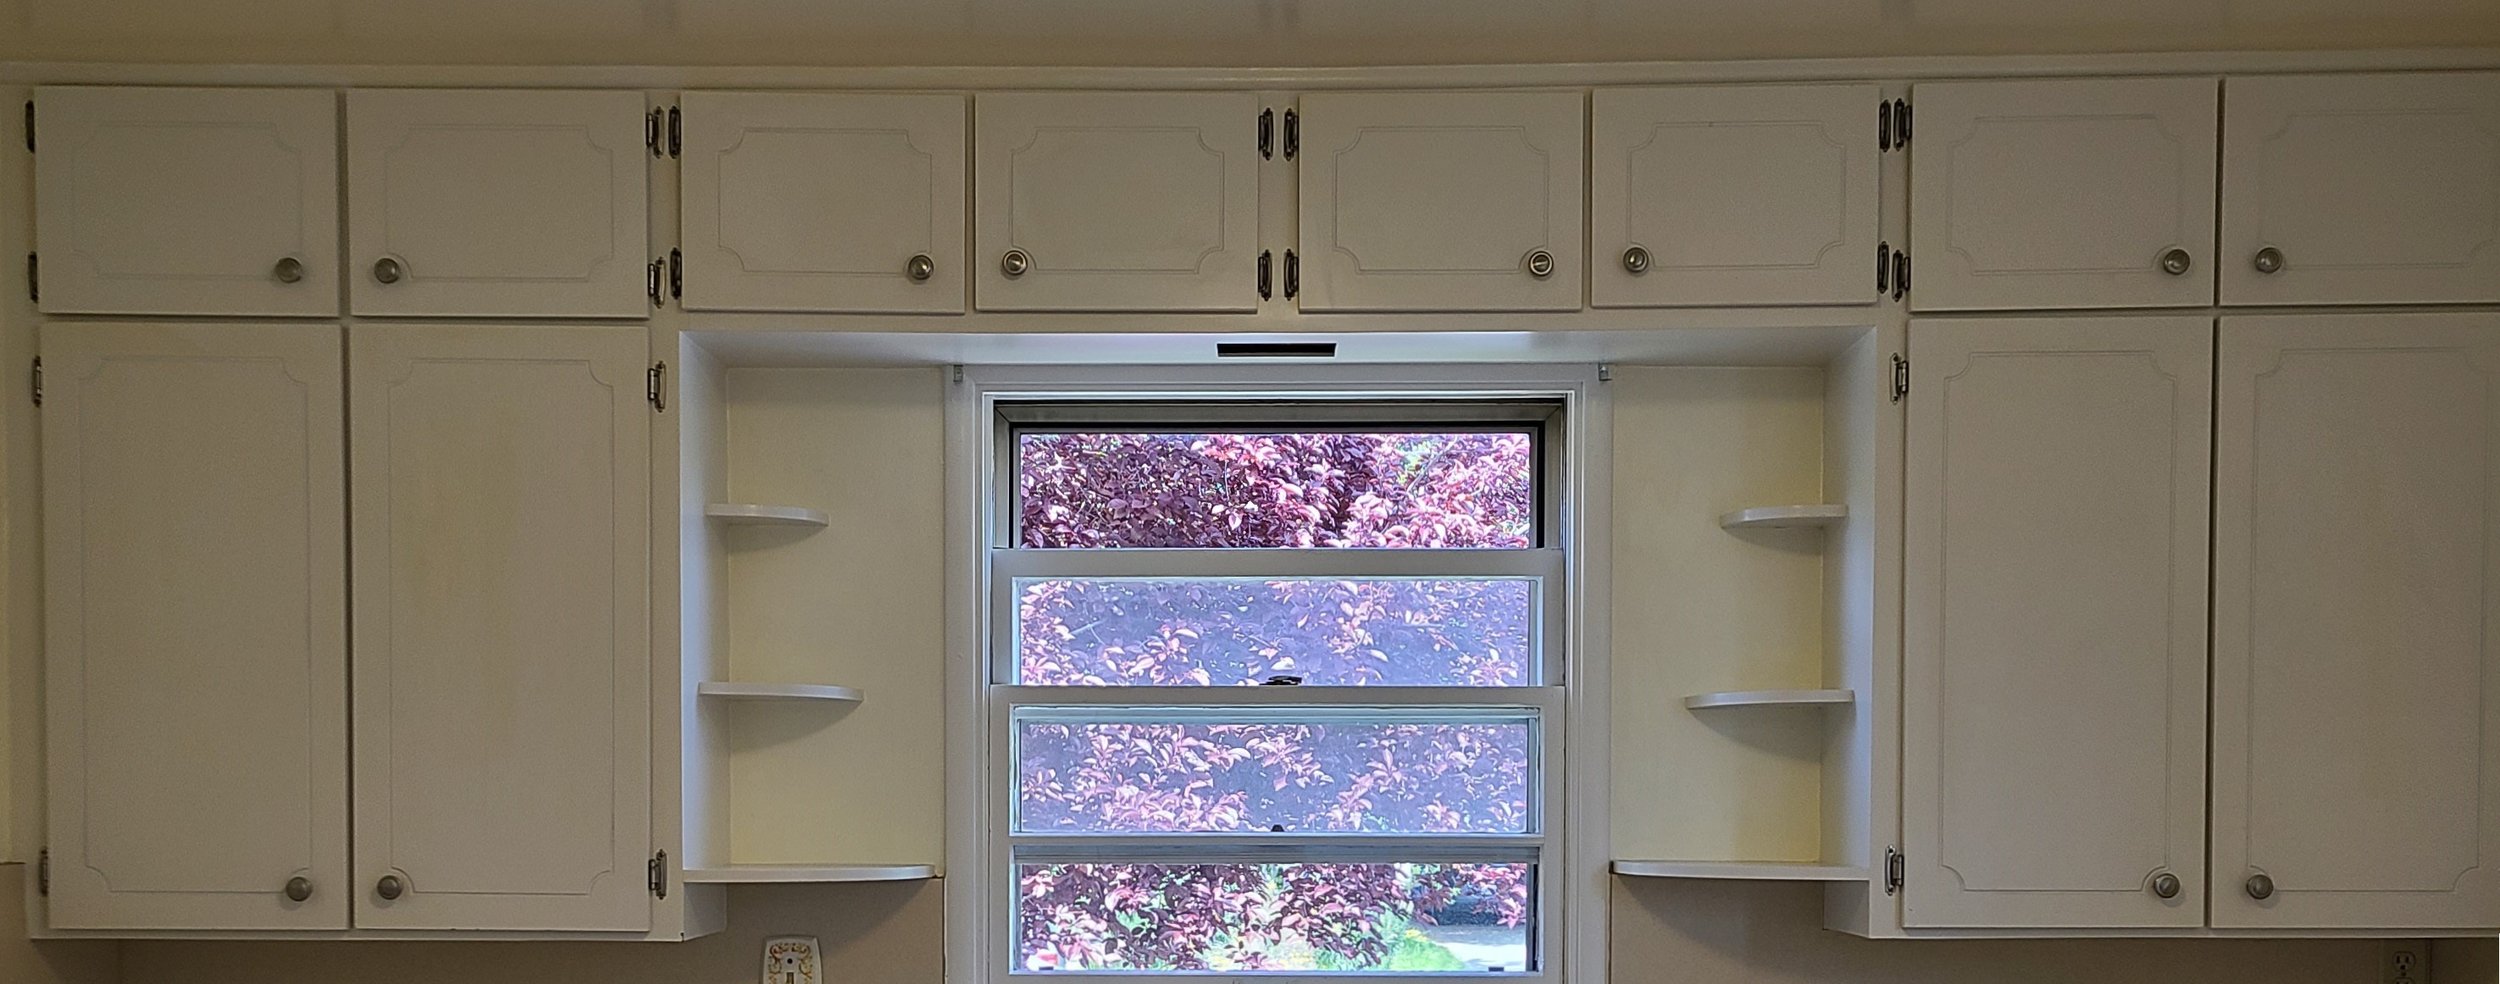
Before: Upper cabinets with exterior mounted hinges

After: Upper cabinets with internal mounted hinges—much cleaner look! Note that the little useless, clutter-collecting shelves have also been removed.
Low(er) Budget, Big Impact!
You can tell from these before and after photos that you don’t have to do a massive renovation to make a big impact! Is everything in the “after” version of this kitchen how I would want it for my dream kitchen? No. But, it is a ton better than the “before” both functionally and visually. And, when budget permits, I can do a full-blown renovation. In the meantime, this sure makes things tolerable and takes the pressure off of spending a lot of money for a full renovation right now.
If you are near or far, reach out if you would like to book a consultation to discuss how you might improve your current kitchen.